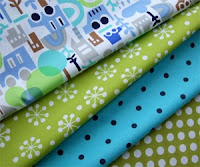
One pound of fabric doesn’t seem like much but you would be amazed at how many projects you can actually make!
In our next sewing meet up group we are going to have a “Project Runway” type challenge. Each person has been coming by and picking up a pound of fabric from an assortment of beautiful sample squares and remnant pieces. Each person will then have to create an item of their choice using only this pound of fabric. This project can basically be anything from clothing, accessories, home decor, or anything they wish to create. Then at the next meet up we will all show each other the cool projects we came up with.
So I thought it would be fitting to share this project I found from this great blog Elle Belle that has some fun project ideas. This project in particular only only requires about a pound of fabric. This is where I found the tutorial for these awesome fabric covered cork boards. In the tutorial they used 4 pieces of 12 by 12 cork, to create four different boards. But you can pretty much make it whatever size you want. Its a great idea for a present, or to add a little something unique to your home. You can use it to tack up pictures, grocery lists, or as an inspiration board for future sewing projects. Take a look:
*A project by Elle Belle
http://ellebelleblog.blogspot.com/
Supplies:
Cork (I picked up a package of 4 12×12 cork tiles at a big box store for about $8), scissors, spray adhesive, a stapler (if you have a mini one that uses smaller staples so they don’t poke out the other side of the cork tile that might save your fingers in the long run), some ribbon, the little adhesive thingies that come with the cork tiles to mount it to the wall, and fabric.
 Step 1 – Cover the cork: Cut your fabric about an inch and a half bigger than your cork tiles (mine was smaller because I working with scraps). Lightly coat one side of the tile with spray adhesive and lay your fabric over the tile. Smooth the fabric out with your hand to remove any wrinkles. Flip the tile over and staple the excess fabric around the back.
Step 2 – Embellish: I laid the three covered tiles on the floor in the order that I wanted to hang them and laid pieces of coordinating ribbon on them in a pattern that I thought made a nice over all design and would also be functional for holding notes and such. Staple the ribbon onto the back of the tile.
 Step 3 – Finish: If I were giving these as a gift I would cut a piece of card stock about half and inch smaller than the tiles and glue it onto the back to cover all the staples and rough edges. Apply the adhesive squares that come with the tiles (I only needed one in each corner and one in the center). Get out your level and stick away! Or, tie them up with some string and add a handmade tag!
*A project by Elle Belle
http://ellebelleblog.blogspot.com/
