Frugal & Fabulous Contest

We are giving a Green Line Bag Away! Thanks to Lindsay for setting this one up!

Here are the details:

Check out the really cool, diy/money saving blog Frugal & Fabulous to enter the contest to win one of our Green Line Shopper Totes.

All you have to do to enter the contest is let Lindsay, the Frugal & Fabulous blogger, know which item or items on the M Avery Designs website is your favorite and you are entered.

She has even set it up where you can get multiple entries into the contest by letting others know about it. Twitter about the contest or write about it on your own blow and she’ll give you some extra chances to win.

The Hills are Alive with the Sound of Ashley


Just a quick blip about the latest bunch of bags we’ve whipped up for the spring! Here is a sampling of the cuties and there are more if you head over to the Ashley section of the site.

Yes, these are clutches and we know all the drunky drunks can’t do clutches. BUT we’ll put a safety strap (a cute one, we promise) on there for you at no cost. Just ask!

Make and adorable Plant Pot from a coffee can and a piece of fabric


Huge shout out to my friend Mary that brought me the most aromatic Basil plant yesterday. I lent her some bins for moving and she brought them back yesterday and went above & beyond and ALSO brought me this plant!

After enjoying the wonderful smell of the basil and shoving it into the noses of all the kids I was teaching at Fashion Lab Afterschool yesterday, I got to work on making it a planting pot from an old Chock full’o Nuts coffee can I had here at the store.

Obviously, it’s pretty simple, but I thought it was such a good idea cause it turned out so well with such minimal effort, and it’s a great way to re-use and recycle.

Here is what I did:

1. Measure the height of the can as well as the diameter of the can.
2. Cut your piece of fabric (a kitchy vintage fabric is what I used here and thought it worked really well!) an inch taller than the can x 1.5 inches longer than the diameter.
3. Fold over the top and bottom of the piece of fabric 1/2″ and topstitch. This creates a nice finished edge on the top and bottom of the can.
4. Fold over one side edge of the fabric 1/2″ and topstitch. This is the side that is going to be visible on the can.
5. Make about 10 tiny holes (for drainage) in the bottom of the coffee can. I made mine by hammering a Phillips head screw driver into the bottom of the can with a rubber mallet. I thought this worked quite nicely.
6. Take the fabric and starting with the edge that is not topstitched, begin to glue the fabric piece to the coffee can lining up the topstitched top and bottom fabric edges with the top and bottom of the coffee can.
7. Keep hot glueing the fabric around the can until you come to where you started. The fabric should run out about 1 inch past the edge that you started at.
8. Pot your plant.

Any questions, let me know.

Do you have a fabric stash that would make fabulous handbags?


Do you have fabric at home that you think would make a great bag?

Now you can come to our Make your Own Handbag Workshop and use your own fabric and save a substantial amount of money.

Here are the new rates for the Handbag Workshop:

Rates
Heather Clutch, Angela Clutch, Alice, Suzi Q, Keri, $50
Ashley Clutch, Suzi Q with Wooden Handles,Vanessa Messenger $60

These rates include All Supplies

Bring your own Outside Fabric (1/2 Yard) take $5 off
Bring your own Outisde & Lining Fabric (1/2 Yard each) take $10 off

Megan is going to Jail

On March 10th, 2009, I am going to be “locked up” for a great cause.

I NEED YOUR HELP!

I’m going behind bars for “GOOD”

PLEASE HELP BAIL ME OUT!

I am being taken to “Jail” and needs to raise $2,400 in “bail” for the Muscular Distrophy Association. Please Help out the cause by making a small donation to the MDA.


Your donation is my key to freedom! Be proud of the fact that together we’re providing help and hope to kids and adults served by MDA in our community.


Here is what your donation can do:

  • $85 -Fund One Minute of Research
  • $100 – Support Group Session
  • $800 – Send one child to MDA Summer Camp
  • $2,000 – Assist with Wheelchair or Leg Braces

    Come on people, help me out and help out those affected with muscular distrophy! I have only raised $10 so far!!!

All Aboard the GREEN Line

Shop the GREEN LINE now.

Hot off the sewing machines is our latest installment of the “Green Line”!

M Avery Designs is doing our part to leave the least amount of carbon imprint on this green earth. We have created a line of gorgeous shoulder bags re-using remnants, upon remnants, of beautiful upholstery fabric from high end furniture stores in Manhattan. Once last seasons of couches and armoires are no longer being sold, they don’t need the fabric sample books anymore. We have figured out a good way to put those (rather substantial sized) fabric pieces to good re-use.

Each bag is completely one of kind and uses 6 remnant pieces of upholstery fabric (3 in the front and 3 in the back), and the handles are made from leather fabric remnants so they will hold up to LOTS of wear and tear. Each is lined with vintage fabric and has a large open pocket inside and each closes with a large, strong magnetic snap.

Yes, we don’t normally use leather in our bags, but we figured it was either use it (on the handle where it matters most) or don’t & it will sit in some landfill somewhere. So we used it. And my thoughts are that and even vegans out there can use our bags (leather and all) and feel good that each and every piece of this leftover leather, is being put to good use in our studio.

Shop the GREEN LINE here.

Fashion Lab Sewing Meet Up Group – First Meet Up Wed. 2/1//09 – Be there!

Calling All stitchers and crafty peeps in the Hoboken & Jersey City are (New Yorkers are welcome to ; )

– – – – – – – – – – – – – – – – – – – – –

I meet so many awesome people everyday that LOVE sewing! I just started a FREE group for people that just love to make stuff!

Our Wed. February 11th, 2009 meeting will be the very first Fashion Lab Sewing Group meeting! We’ll discuss what the group is going to be all about and some of the things we are going to do in the group.Meeting starts at 7pm!

If you’d like bring your ideas for making this group super fun! You can also bring along cool stuff you have stitched on your sewing machine.
You are more than welcome to come even if you haven’t sewn before, but it’s something you would like to learn how to do!
I am sooooo looking forward to this! See you then!!

Thanks to the Feminist Review Blog

Just wanted to thank the Feminist Review Blog for taking the time to make some bags from our book and for writing about their experience on their blog on Saturday January 17, 2009!

Bag Bazaar: 25 Stylish Bags to Sew in an Afternoon

By Megan Avery

Potter Craft


As a fashion design student, I’m always looking for fresh ideas, and Bag Bazaar: 25 Stylish Bags to Sew in an Afternoon immediately piqued my interest.

Avery’s background is quite interesting. She didn’t attend design school and, in fact, majored in television and radio in college. Avery became interested in making bags because she couldn’t afford designer prices, so with little sewing experience, she began making her own. Seven years later, she has her own studio, M Avery Design, where she teaches “Make Your Own Handbags” and other sewing workshops.

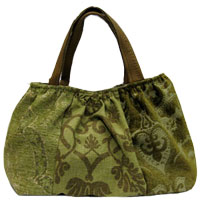
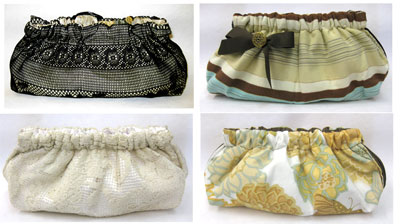
This compact, concise (120 pages), and colorful book is broken up into three sections. In the first part, Avery explains basic bag-making and sewing techniques, such as how to put in a zipper, topstitching, and making gussets. In the second part of Bag Bazaar, readers are given a dozen delightful handbags projects, and in the third section Avery provides instructions for several interesting specialty bags, like a yoga mat bag and a wine tote.

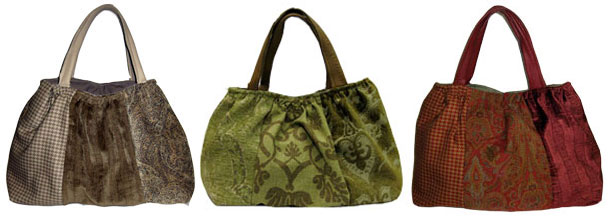
The best way to experience a craft book is to attempt some of the projects. I chose two bags with different levels of difficulty: the Alice shoulder bag (labeled as easy) and the Meredith flap closure shoulder bag (labeled as intermediate). Avery provides the pattern dimensions of each bag along with the list of supplies you will need, including the type and amount of fabric to use. For both bags, I used cotton pique fabric and tag board for the pattern.

Because I’ve been sewing for many years, I didn’t follow Avery’s directions completely. For instance, I used the pattern to cut out the interfacing and fabric pieces first; Avery has a different technique where you fuse the interfacing on to the fabric first and cut out the pieces of fabric using the edge of the interfacing as guide. This is a small difference, and I’m going to try her technique in the future. For creating the gussets, I had to read the directions several times before I understood how to proceed, but after that the bag was a breeze to make.

How did my bags turn out? The flap for my Meredith bag seemed bigger than the purse base—something I will have to work on—but overall, both the Meredith and the Alice were adorable.

Avery’s directions, both written and visual, are easy to understand, and the supplies she recommends can be found at your local fabric store. For someone who has never worked with a sewing machine, Bag Bazaar might be a bit challenging. That said, for someone who has been sewing for awhile, this is a great book for furthering your creativity.

Review by Su Lin Mangan

I learned to make jewelry… The real Way!

So we are branching out, here at M Avery Designs and have decided to offer some classes beyond sewing. Our next upcoming new & different class happens to be the “Make your Own Wrap Earrings” class and that is taking place this coming Wednesday, January 21st starting at 7 at the store!

Now, I know NOTHING about making jewelry, so I asked a friend of mine, who makes really gorgeous jewelry, to teach the class. She happily obliged but was a little nervous about teaching the class and asked if we could do a practice run through before the class.

Here is Nancy Green at her work table.
I thought practice class would be a FABULOUS idea because I was going to get to be the guinea pig-student. This would then mean I would get to learn how to make gorgeous jewelry for myself! Yahoo! Let’s do this!

So we met on Thursday morning at here studio, here in Hoboken. She showed me all her fabulous findings and showed me all her tools and we got started.


Now, Yes, I have made jewelry before. Sure – I guess you could call me a beginner bead stringer. But I have not done anything beyond this.

The whole concept of wrapping wire with beads in some sort of pretty way to make cool earrings sounded a bit daunting for me. But after I saw Nancy wrap some of the wire & beads, I breathed a sigh of relief and figured this was something I could handle.

All in all, Nancy and I spent about an hour and half together Thursday. She took me through the basics of working with the wire and then we tackled our first project… Once i got the hang of it, I was able to get three earrings done and finished the fourth at home.

Here is the pair we finished:
It’s pretty obvious, you can make some cool stuff that looks pretty darn professional.

If you’ve dabbled in jewelry making and want to take it to the next level, the earring class is for you.

Sign up online and use the promo code “nancyg” when you check out and get $10 off!

Hope to see you Wednesday!